Showing posts with label Nail Art. Show all posts

Wednesday, November 9, 2011

Tutorial: Neutral leopard print


Here is my latest NOTD. Having to keep it tame for work so I like to think of it as subtle leopard print.  It's so simple to do yet I got lots of compliments so I thought I may as well do a step by step guide despite the fact that you have probably seen it 1000+ times before :)  Trust me, anyone can do this!


All you need is three things. A base colour, a nail art pen (or fine paintbrush and top colour) and a clear top coat. I used Essie's Chinchilly as my base coat which is a lovely greige! For the leopard pattern i whipped out my trusty Sally Hansen nail art pen in black (don't know what I would do without it)I finished it all off with my favourite Chanel top coat. Viola.


All you do is apply the base coat and wait for it to dry. On top of that draw leopard spots (or attempt to like me) I embraced the messy spots! Apply the clear top coat and you are done.


Rawr!  Told you it was easy!


Hope everyone is having a great Wednesday :)


(Also I have a GREAT tutorial heading your direction so watch out)


Friday, September 16, 2011

NOTD + Tutorial - Basketcase nails


Hey Dolls, 


You may or may not already know I am completely obsessed with WAH nails. As usual I was browsing the WAH site for inspiration and came across this pattern called 'basketcase' and had to try it. If you are bored and want nail inspiration I definitely suggest you check it out, they have amazing designs. Come to Australia WAH!

The original pictures I saw were in black and white but I decided to use pinky purpley colours. This would looks amazing in any colours, black and gold is my what I'm thinking next time. As usual my attempt is a bit dodgey and needs work but I love it! The design was relatively easy although as usual my right hand is not quite perfect. Hope that you like it!


Here is a step by step tutorial on how to get this pattern...


All you need two colours. A base colour and a colour for the stripes. You can either use a nail art polish or pen or alternatively you can buy a fine paintbrush and use any nail polish.
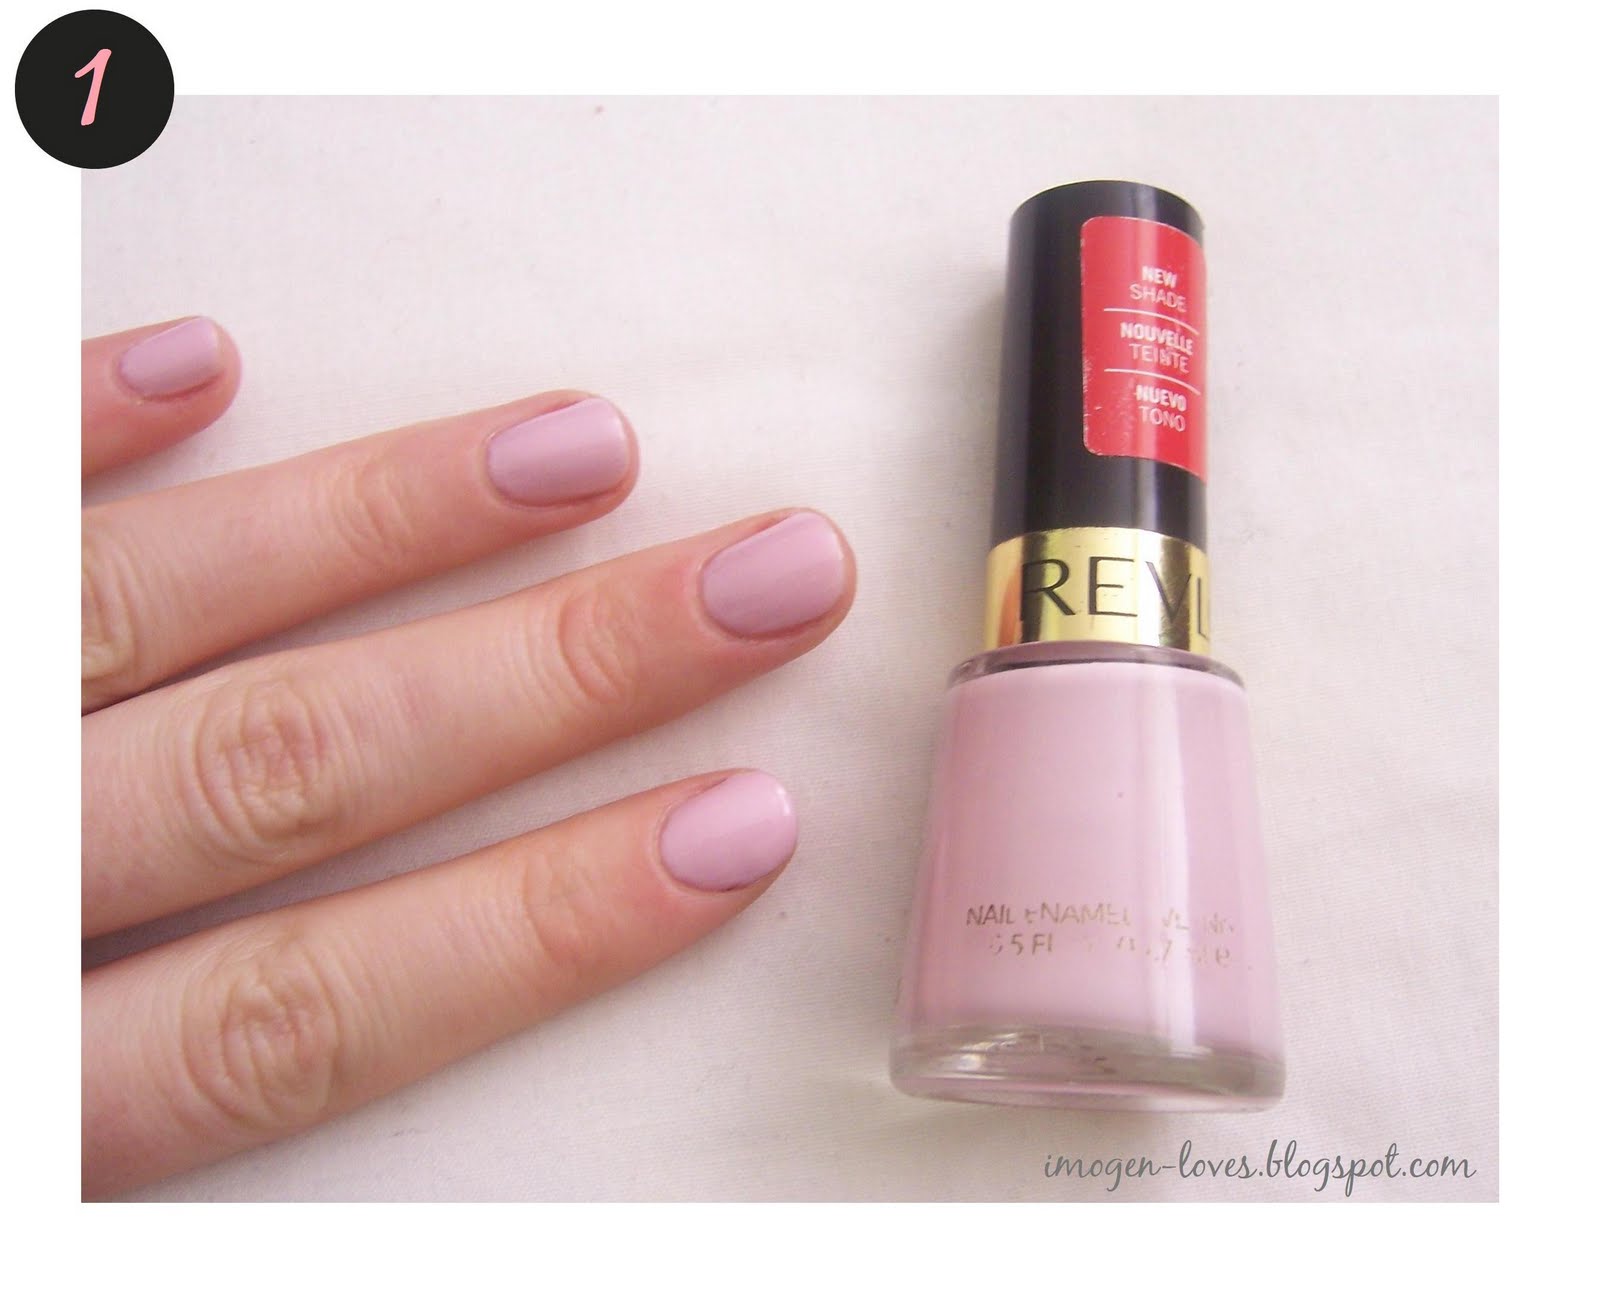
The first step is to simply paint your nails with the base colour. I used Revlon's Lilac Pastelle.

Once the base coat has dried completely draw a thin diagonal line with the nail art polish from the bottom corner to the opposite top corner.
Then continue to draw parallel thin lines to fill in the bottom section.

Next is to paint a diagonal line in the opposite direction and fill in the section section of the nail.
The final step is to fill in the top section of the nail with horizontal lines. Follow this with a clear top coat and you are done!

Here here we have the finished result. Trust me it's not too hard.
 If you love it, give it a go.


:)

Friday, June 24, 2011

NOTD: Stripey Nails


Good Morning everyone!

So I am sick again so I haven't been wearing any makeup lately so I'm back with another nail polish post. 

Being cooped up inside made me restless so I decided to jump on the nail art bandwagon by copying a WAH design. I love WAH nails and their blog is one of my favourite places to browse and get inspiration. Here is the design I ripped off.

I think I need to practice for a month straight to get to WAH level!


To create these babies I used Sticky Tape, Essie Tart Deco, Essie Van D'go, Ulta3 Lily White, Chanel Laque Brillance Extreme, Sally Hansen Nail art pen in black. 

It was a bit fiddly but I had fun doing it. My right hand is a bit dodge, straight lines are hard with your left hand! 

I am definitely going to track down some of the Model's Own & WAH nail art pens, has anyone tried them??


Happy Friday
Imogen x


Friday, May 20, 2011

Aztec Inspired NOTD

.
Hi Beauties,

I have seen lots of gorgeous Aztec inspired nails all over the place lately so I decided to jump on the bandwagon and here is what I ended up with..


I had a lot fun doing it but my thumb was as far as I was going. I have nowhere near enough patience or skill to do my other fingers that's for sure. It was actually reasonably easy and I am really happy with the finished product. When I have a bit of spare time I will definitely sit down and have another play around and see what I come up with.

Anyway if you are curious how I did it the instructions are just below :)

Here is what I used; 
Essie Lilacism
Ulta3 Spring Fling
Ulta 3 Lily White
Essie Lapis of Luxury
Seche Vite
Sally Hansen Black nail art pen
Sticky tape

1. I started off by cutting the sticky tape into small strips and stuck them on my nail creating stripes, with 2 sections of my nail showing and 2 not. I painted the gaps between the tape, one gap with Lilacism and the other with Lapis of Luxury 
2. After waiting for them to dry I peeled off the tape and painted the remaining two stripes on my nail another 2 colours - Spring Fling and Lily White
3. After that dried I used the black Sally Hansen nail art pen to draw the patterns over the nail, this is where you can let your creative side out and do whatever you please!
4. I simply let that dry and applied a layer of Seche Vite over the top to stop the pen from smudging
5. I then painted the rest of my nails with Spring Fling


And there we have it. Pretty simple as long as you have a bit of spare time hanging about.

Have a lovely day!


Sunday, March 27, 2011

Nail tutorial - Gold & Silver Leopard


Seeing as I'm going through a bit of a leopard print phase I thought I would have a crack at gold and silver leopard print. I think it's kind of cute so I thought I would show everyone step by step how I did it.


So here is how I got this result...

It was surprisingly simple to do and I used; Ulta3 polish in Antique Copper, Ulta3 polish in Silver Grey, Seche Vite, Black nail art pen and a thin paintbrush.

I started of by applying 2 coats of the gold colour for the base & let it dry completely.

Then using the paintbrush I used the silver polish to paint small random spots & shapes on each nail. It was really hard to capture the silver on the gold but hopefully these pics give you the general idea.

Next I outlined the silver spots with the black nail art pen. I wasn't too fussed being to precise so I just roughly went around the edges. Once the nail pen dried I applied a coat of Seche Vite. Make sure the nail art pen is compelety dry or you will smudge it like me. Patience is not my strength!

And that is it. Done and done

 
Hope everyone is having a great weekend and doing very productive things like painting their nails!
:)


Sunday, February 27, 2011

Step by step NOTD


Hello lovely readers, 

This post was completely inspired by the gorgeous Saskia the Style Fairy. She did a post the other day showing her nails she got done at WAH Nails and I fell in love. I can't get enough of WAH Nails so thought I would give it a go at trying to recreate her fantastic nails. 

It's just a black matte nail with glossy black dots. It's not a brilliant job but i had fun doing it! 


If you're interested in how I did my (somewhat shonky) version keep reading...

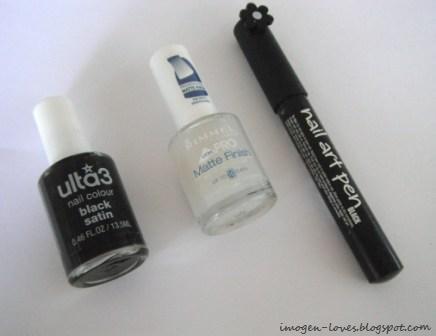
All i used was a black nail polish, a matte top coat and a black nail art pen

I started off by applying the plain black polish. 

After that dried I applied one coat of the Rimmel Matte finish top coat. This is a new purchase and the first time I used it. It's pretty cool. Easy to apply and dried really quickly. Going to have fun with this product, especially in winter!

I then used my black nail art pen to draw on small dots. Alternatively you could use a clear top coat or polish (which would probably be easier) but I didn't have a paint brush to paint on small enough even dots so I just used the pen. 

Wait for it to dry and that is it. Super easy and pretty nice if you ask me :)


xx


Friday, October 22, 2010

Glitter Leopard

I got a bit adventurous with the nails today - Glitter leopard. I have been putting of an assignment I have like crazy and this is what I managed to do instead. Very productive I think :p

The photos don't quite do them justice. The leopard print does stand out more in real life and they are pretty sparkly which you can't quite tell in these pictures.  


Here is what I used to create these babies.


It was super easy, here's what I did it;
I started off by applying my Orly base coat
I then applied 2 coats of Essie's Playa Del Platnium (which is a really nice greige)
I then used my Sally Hansen nail art pen and attempted (very dodgely) to create a leopard print pattern.
♥ Ove the top I applied a cheap glitter polish by BYS in silver over the top. The glitter layer works really well at it sort of disguises the leopard print if you have done a bad job like me, especially on my right hand. Next time I would use glitter with a thinner consistency as it covered up the leopard a bit more than I would have liked.

That's it! I was suprised with the amount of compliments I got about them today.  I want to do gold toned glitter leopard next time. I think that would be awesome.


Not long until the weekend, yay :)


Saturday, September 4, 2010

Nail Art

Hey lovelies,

I picked this Nail Art pen up the other day and wanted to share it. It's the Sally Hansen nail art pen in black. I know you can achieve pretty much the same with a gel pen but I saw it and thought why not. 


The tips looks a bit thick but you can get a fine line. I'm excited thinking about all the possibilities, i just wish i had a steadier hand!

Here is an ad for the pens which I like. I'm not sure how'd I'd go trying to do those neat sqaures though!


This one is black but they had 8 different colours to choose from so I can imagine my collection slowly growing. I have only mucked around with it so far and it seems really easy to use, I thought it might be harder actually.

The only thing drawback is the drying time before putting a top coat on, but I am quite impatient!

I'm just about to go experiment with it so keep an eye out for a NOTD putting this to use coming up very soon I promise :)

Has anyone tried these?